Making a (Long-Winded) Case for Turbolinks
Turbolinks is the coolest technology not nearly enough websites are using. And I’m gonna try to convince you of that as we build a simple application together. How you ask? In three steps: First, we’ll build our app like we might have in days long gone (like circa 2008). Second, we’ll React-ify it, and consider the complexity that adds. And lastly, we’ll look at just how little we have to change in our first version to realize the bulk of the benefits we got by adding React in the first place!
So let’s party like it’s 2008! 🎊
Not even joking a little bit here, this was the nirvana of web development. Browsers (not developers) sent data to servers, and servers sent back HTML. Full, round-trips every time. Developers actually rendered <form> tags! Sure, sometimes we sent a little sprinkle of JavaScript, but for any real work, we fully expected the users would send requests back to our server. Apps were largely stateless. And life was simple 🏕
For a moment, let’s go back to that. Let’s build a TodoMVC app like it’s 2008!
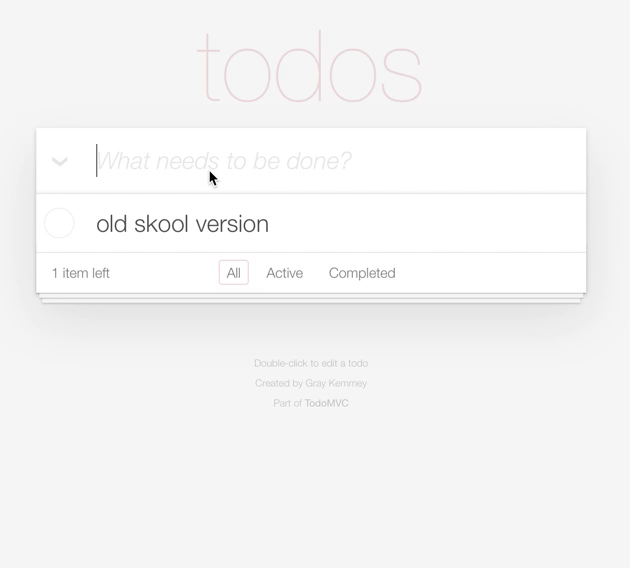
If you’ve never seen one of these before, they look like this:
Ok, so some requirements:
- Let’s be a real app. A lot of (all?) the examples at TodoMVC just write to local storage. How useful is that? So we’ll save todos to a database associated with the user’s session such that refreshing the page doesn’t lose the todos (but they can go away when the user kills their browser).
- Add a new todo in the box at the top.
- Complete individual todos.
- Delete individual todos (“x” at the right of the todo).
- Complete all showing todos (clicking down chevron at the top).
- Clear all showing completed todos (link at the bottom).
- Double click to edit an existing. Saves on blur. Escape cancels the edit.
- Filter by “All”, “Active”, and “Completed” (links at the bottom).
So that’s not nothing. Let’s build it! Using Express…like it’s 2008…even though Node didn’t come along until 2009…and, uh, Express…well, not until 2010…ok, we’ll build it like it’s 2008-ish! 😬
Old Skool Version
Database
Honestly, we’re gonna gloss right over this. All versions of this app need the same one, and it doesn’t really change. Code is linked at the bottom if you want to know more, but in short we’ll use Sequelize, SQLite, and a single todos table with session_user_id, title, completed columns. Plus, your typical id, created_at, and updated_at columns, for good measure.
next() 👈 Heh, get it? That’s an Express joke, albeit a bad one.
Routes
Being RESTful seems reasonable. Let’s put these in a table and think about the path, the HTTP verb we wanna use, and a description of what it does.
| HTTP verb | Path | Description |
|---|---|---|
| GET | /[?completed=(true|false)] | Renders our only page with all the todos. Handles a filter param. |
| POST | / | Creates a new todo |
| PATCH | /:id | Updates the todo with id == :id |
| DELETE | /:id | Deletes the todo with id == :id |
| PATCH | /update_many | Updates many todos (we’ll send a list of ids in the body) |
| DELETE | /destroy_many | Deletes many todos (we’ll send a list of ids in the body) |
Alright, let’s see some codes:
// app/controllers/index.js

var express = require('express')
var router = express.Router()
var models = require("../models")

router.get('/', function(req, res) {
  res.render('index', { ... })
})

router.post('/', function(req, res) {
  // create todo
  res.redirect('/');
})

router.patch('/:id', function(req, res) {
  // update todo
  res.redirect('/');
})

router.delete('/:id', function(req, res) {
  // destroy todo
  res.redirect('/');
})

router.patch('/update_many', function(req, res) {
  // update many todos
  res.redirect('/');
})

router.delete('/destroy_many', function(req, res) {
  // destroy many todos
  res.redirect('/');
})

module.exports = router
// app.js

var express = require('express');
var app = express();

app.set('port', (process.env.PORT || 5000));
app.use(require(path.join(__dirname, '/app/controllers')))

app.listen(app.get('port'), function() {
  console.log('Node app is running on port', app.get('port'));
  console.log('Running in '+ app.settings.env)
});
We’re gonna skip over any robust error handling across all our versions of this app. Otherwise, I think that’s pretty reasonable. We have one GET endpoint responsible for rendering a view, and five endpoints responsible for performing some action and redirecting to that view.
There’s an elegance in that simplicity, in my opinion 😍
Current User (session_user_id)
We’ll punt the managing of your session to some middleware called express-session. And add this to our app.js:
// app.js

var session = require('express-session');

// configure express-session middleware
app.use(session({
  secret: 'secret_key_base', // TODO - should be better in a real app
  resave: false,
  saveUninitialized: true
}))

// our code that sets a userId in the session if we don't already have one
app.use(function (req, res, next) {
  if (!req.session.userId) {
    req.session.userId = hex()
  }

  next()
})
hex() is a function I undoubtedly stole, but can’t remember where from 😬 Anyway, its implementation isn’t important, but it’s here for the curious.
The View
Static Assets
We won’t have much of an app without some CSS. And we’ll need at least a little JavaScript to toggle our todo for editing. So let’s tell Express how to handle those assets:
-
Copy this to
public/css/application.css. And create an emptypublic/js/application.jsfile. -
Add this to
app.jsbeforelisten// app.js app.use(express.static(path.join(__dirname, '/public')));
Cool, now we just gotta add those files to our <head>, which we’ll get to in the next part.
index.ejs
Templating languages were all the rage in 2008. The idea being, we can create a dynamic experience by altering the HTML we send back based on the resources we know exist – in our case, the todos. I hate that these have fallen out of vogue. Given that the end goal of all web rendering is HTML, these sit right above that goal. Most of the template is HTML and it becomes quite easy to get an idea of the final output just by reading the template file.
Since we’re building an Express app, we’ll use EJS templates. First, we gotta tell Express that that’s the plan:
// app.js

app.set('views', path.join(__dirname, '/app/views'));
app.set('view engine', 'ejs');
And then create our template. Let’s fill in some of the skeleton our final app will render. And we can go ahead and tackle including our static assets in the <head> part of our HTML now, too:
<!-- app/views/index.ejs -->

<!DOCTYPE html>
<html lang="en">
  <head>
    <link rel="stylesheet" media="all" href="/css/application.css">
    <script type="text/javascript" src="/js/application.js" defer></script>
  </head>

  <body>
    <section id="todoapp">
      <header id="header">
        <h1>todos</h1>
      </header>

      <section id="main">
        <ul id="todos">
        </ul>
      </section>

      <footer id="footer">
      </footer>
    </section>

    <footer id="info">
      <p>Double-click to edit a todo</p>
      <p>Created by Gray Kemmey</p>
      <p>Part of <a href="http://todomvc.com">TodoMVC</a></p>
    </footer>
  </body>
</html>
And with that, we should be about this far:

Creating and Displaying Todos
We’ll tackle these together since neither is abundantly useful on their own.
Creating
First, we need a way to get todos from our users. In 2008, we used <form> tags. So let’s add one to our <header> skeleton:
<!-- app/views/index.ejs -->

<header id="header">
  <h1>todos</h1>
  <form action="/" method="post" accept-charset="UTF-8" >
    <input id="new-todo" name="todo[title]" type="text"
                                            placeholder="What needs to be done?"
                                            autofocus="autofocus"
                                            autocomplete="off">
  </form>
</header>
And that’s all the browsers-side stuff we need to create a todo – a little HTML. We do have to tell Express about our plan though:
// app.js

var bodyParser = require('body-parser');

// tell it how to parse body contents
app.use(bodyParser.urlencoded({ extended: true }));
And now we can read the contents of the form off req.body in our route:
// app/controllers/index.js

router.post('/', function(req, res) {
  models.Todo.
    create({ title: req.body.todo.title, sessionUserId: req.session.userId }).
    then(function() {
      res.redirect('/');
    })
});
Which brings us to…
Displaying Todos
Let’s add to our GET / route so we can access todos in our template:
// app/controllers/index.js

router.get('/', function(req, res) {
  models.Todo.
    findAll({ where: { sessionUserId: req.session.userId } }).
    then(function(todos) {
      res.render('index', { todos: todos })
    })
})
Now we can access a variable called todos in our template. Let’s add to the skeleton <ul> we added earlier:
<!-- app/views/index.ejs -->

<ul id="todos">
  <% todos.forEach((todo) => { %>
    <li class="<%= todo.completed ? "completed" : "" %>">
      <div class="view">
        <label><%= todo.title %></label>
      </div>
    </li>
  <% }) %>
</ul>
That’ll get us this far:
And that’s it! We aren’t running any JavaScript on the browser. We just have a server that will respond to a GET request to / by rendering HTML with a form and with some variable number todos in a <ul> tag. When the browser submits that form it POSTs to /, where we have a route handler waiting to read the title off the body, the userId off the session, insert a row in the database, and redirect the browser right back to where it was. Our browser sends another GET to / and we get the same form with our new todo added to the HTML.
Forms, forms, forms, and more forms
We can keep using this pattern of sending data to the server, letting the server perform some update, and then telling our browser where to go next. And <forms> are the building block for doing so.
But first, we gotta do some more Express configuring so we can “fake” having <forms> that submit non-POST requests. This is an interesting downside to our “forms as the building blocks of user interaction” approach. But one with a fairly established workaround. Again, we’ll punt to some middleware:
// app.js

var methodOverride = require('method-override')

// override POST requests that have a `_method` param
app.use(methodOverride(function (req, res) {
  if (req.body && typeof req.body === 'object' && '_method' in req.body) {
    var method = req.body._method
    delete req.body._method
    return method.toUpperCase();
  }
}));
With this we can add a hidden input to tell our server what type of HTTP method we want this form to be submitted as, and this helps us keep our routes RESTful.
Deleting a todo
A form with just a submit button:
<!-- app/views/index.ejs -->

<li class="<%= todo.completed ? "completed" : "" %>">
  <div clas="view">
    <label><%= todo.title %></label>

    <form action="/<%= todo.id %>" accept-charset="UTF-8" method="post">
      <!-- 👇 method override magics 🔮 -->
      <input type="hidden" name="_method" value="delete">
      <button name="button" type="submit" class="destroy"></button>
    </form>
  </div>
</li>
And a route to support that:
// app/controllers/index.js

router.delete('/:id', function(req, res) {
  models.Todo.
    destroy({ where: { id: req.params.id, sessionUserId: req.session.userId } }).
    then(function() {
      res.redirect('/');
    })
})
Deleting all the completed todos
Ok, this adds a small wrinkle. When we’re just operating on a single todo, we can encode which one by using the id of the todo in the route. When we’re operating on many, we’ll have to tell the server which ones. Luckily, we can store that information right in the form:
<!-- app/views/index.ejs -->

<footer id="footer" class="<%= todos.length === 0 ? "hidden" : "" %>">
  <% if (todos.filter((t) => ( t.completed )).length > 0) { %>
    <form action="/destroy_many" method="post" accept-charset="UTF-8">
      <input type="hidden" name="_method" value="delete">

      <% todos.filter((t) => ( t.completed )).forEach((t) => { %>
        <input type="hidden" name="ids[]" value="<%= t.id %>">
      <% }) %>

      <button name="button" type="submit" id="clear-completed">Clear completed</button>
    </form>
  <% } %>
</footer>
And on the server, we’ll be able to access those ids in req.body.ids. So we can write our route like so:
// app/controllers/index.js

router.delete('/destroy_many', function(req, res) {
  models.Todo.
    destroy({ where: { id: req.body.ids, sessionUserId: req.session.userId } }).
    then(function() {
      res.redirect('/');
    })
})
Toggling a todo
Ok, we finally have to write a little JavaScript to get the interaction we want. To implement this feature, we’re still going to use a <form>, but it won’t have a submit button. Instead, it’ll just have a single checkbox <input>, and when the user clicks it our JavaScript will submit the form for them. Let’s take a look:
// public/js/application.js

function on(element, event, selector, handler) {
  element.addEventListener(event, function(_event) {
    var target = _event.target;

    while (target && target !== this) {
      if (target.matches(selector)) {
          handler.call(target, _event);
      }

      target = target.parentNode;
    }
  });
}

on(document, "click", "[data-behavior~=submit_form_when_clicked]", function(event) {
  this.closest("form").submit();
});
First, we define a function called on. We’re gonna skip over the details of what that does, but it lets us define event listeners on the document that run when the event propagates to an element that matches our selector.
So then the next thing we do is define a function that we want to run whenever a click event is propagated to an element that matches the [data-behavior~=submit_form_when_clicked] selector. And that function finds the closest <form> tag to that matching element and submits it.
Let’s see the HTML:
<!-- app/views/index.ejs -->

<li class="<%= todo.completed ? "completed" : "" %>">
  <div class="view">

    <form action="/<%= todo.id %>" method="post" accept-charset="UTF-8">
      <input type="hidden" name="_method" value="patch">
      <input name="todo[completed]" type="hidden" value="0">
      <input id="todo_is_completed" name="todo[completed]"
                                    type="checkbox"
                                    value="1"
                                    class="toggle"
                                    <%= todo.completed ? 'checked="checked"' : '' %>
                                    data-behavior="submit_form_when_clicked">
    </form>

    <!-- ... -->
  </div>
</li>
And with that data-behavior attribute added to our checkbox, the form will submit when we click it. We also need to render a hidden value that represents our checkbox unchecked. You can read more about that here, but suffice it to say browsers don’t send unchecked checkbox data when forms are submitted on their own.
On our server, req.todo.completed will either be "0" when the checkbox is unchecked or ["0", "1"] when it’s checked. Let’s look at the route:
// app/controllers/index.js

router.patch('/:id', function(req, res) {
  models.Todo.
    findOne({ where: { id: req.params.id, sessionUserId: req.session.userId } }).
    then((todo) => {
      var { completed } = req.body.todo
      if (completed) { todo.completed = Array.from(completed).slice(-1)[0] === "1" }

      todo.save().then(() => { res.redirect("/") })
    })
})
Array.from(completed).slice(-1)[0] takes completed and turns it into ["0"] if it’s "0", leaves it alone if it’s already ["0", "1"], then grabs just the last element. We can then check if it’s equal to "1" to determine if the todo should be marked as completed or not.
Completing all the todos
For the penultimate <form>, we can combine the ideas in the last two into one form that marks all the todos as completed:
<!-- app/views/index.js -->

<section id="main">
  <form action="/update_many" method="post" accept-charset="UTF-8">
    <input type="hidden" name="_method" value="patch">

    <% todos.forEach((todo) => { %>
      <input type="hidden" name="ids[]" value="<%= todo.id %>">
    <% }) %>

    <input name="todo[completed]" type="hidden" value="0">
    <input id="toggle-all" name="todo[completed]" type="checkbox"
                                                  value="1"
                                                  <%= todos.every((t) => ( t.completed )) ? 'checked="checked"' : '' %>
                                                  data-behavior="submit_form_when_clicked">
    <label for="toggle-all">Mark all as complete</label>
  </form>

  <!-- ... -->
</section>
So we put all the ids into the <form>, we added the hidden <input> for the checkbox, and wired up the JavaScript listener for submitting the form when the checkbox is clicked, and then on the server:
// app/controllers/index.js

router.patch('/update_many', function(req, res) {
  models.Todo.
    update(
      { completed: Array.from(req.body.todo.completed).slice(-1)[0] === "1" },
      { where: { id: req.body.ids, sessionUserId: req.session.userId } }
    ).
    then(function() {
      res.redirect('/');
    })
})
Editing a todo
This one requires a little more from us on the JavaScript side to build the interaction we want. Specifically:
- A user can double click a todo to edit. Because of our CSS, to achieve this all we gotta do is add the
editingclass to the<li>for the todo. - On blur, we’ll submit the edit to the server.
- They can cancel the edit by escaping.
Let’s write the handlers for those three cases:
// public/js/application.js

on(document, "dblclick", "[data-behavior~=double_click_to_edit]", function(event) {
  this.classList.add("editing");

  this.querySelector("input.edit").focus();
  this.querySelector("input.edit").select();
});

on(document, "focusout", "[data-behavior~=submit_form_when_blurred]", function(event) {
  if (this.closest(".editing[data-behavior~=double_click_to_edit]")) {
    this.closest("form").submit();
  }
});

on(document, "keydown", "[data-behavior~=cancel_edit_on_escape]", function(event) {
  if (event.keyCode != 27) { return; } // only the escape button

  var li = this.closest("[data-behavior~=double_click_to_edit]");
  li.classList.remove("editing");
});
And the HTML:
<!-- app/views/index.ejs -->

<!-- we add the double_click handler                 👇 -->
<li class="<%= todo.completed ? "completed" : "" %>" data-behavior="double_click_to_edit">
  <div class="view">
    <!-- ...form to toggle completion we already wrote... -->

    <label><%= todo.title %></label>

    <!-- ...form to delete completion we already wrote... -->
  </div>

  <form action="/<%= todo.id %>" method="post" accept-charset="UTF-8">
    <input type="hidden" name="_method" value="patch">
    <input id="todo_title" name="todo[title]" type="text"
                                              value="<%= todo.title %>"
                                              class="edit"
                                              autocomplete="off"
                                              data-behavior="<%= [
                                                'submit_form_when_blurred',
                                                'cancel_edit_on_escape'
                                              ].join(' ') %>">
    <!-- and our other handlers on the input  👆 -->
  </form>
</li>
And we’ve gotta slightly modify our PATCH /:id route to handle the title change:
// app/controllers/index.js

router.patch('/:id', function(req, res) {
  models.Todo.
    findOne({ where: { id: req.params.id, sessionUserId: req.session.userId } }).
    then((todo) => {
      // 👇 destructure title, too
      var { title, completed } = req.body.todo
      // 👇 and add the update
      if (title) { todo.title = title }

      if (completed) { todo.completed = Array.from(completed).slice(-1)[0] === "1" }

      todo.save().then(() => { res.redirect("/") })
    })
})
And that’s not too bad. We did have to write a couple “hacks” to circumvent how HTML behaves a little bit. And we did have to write a little JavaScript to get the interaction we wanted. But we’re still able to use <forms> as the building block for our interactions. And so long as we do that, we get to let the browser be the workhorse for communicating with our server.
Filtering
The last thing we gotta solve for is those filters at the bottom. We don’t need anything special, just normal links, and we’ll pass a little more context to our template from our server. Let’s start with the HTML:
<!-- app/views/index.ejs -->

<footer id="footer" class="<%= todos.length === 0 && !filtering ? "hidden" : "" %>">
  <span id="todo-count">
    <%= ((count) => (
          `${count} ${count === 1 ? "item" : "items"} left`
        ))(todos.filter((t) => ( !t.completed )).length) %>
  </span>

  <ul id="filters">
    <li>
      <a href="/"
         id="all"
         class="<%= url === '/' || url === '/todos' ? "selected" : "" %>">All</a>
    </li>
    <li>
      <a href="/?completed=false"
         id="active"
         class="<%= url.includes('completed=false') ? "selected" : "" %>">Active</a>
    </li>
    <li>
      <a href="/?completed=true"
         id="completed"
         class="<%= url.includes('completed=true') ? "selected" : "" %>">Completed</a>
    </li>
  </ul>

  <!-- ...form to clear completed we already wrote... -->
</footer>
So we’re using a filtering boolean and url variable. Let’s adjust our route to pass those as well as do the actual filtering:
// app/controllers/index.js

router.get('/', function(req, res) {
  var query = { where: { sessionUserId: req.session.userId } }
  var filtering = !(req.query.completed === null || req.query.completed === undefined)

  if (filtering) {
    query.where.completed = req.query.completed === "true"
  }

  models.Todo.
    findAll(query).
    then(function(todos) {
      res.render('index', {
        todos: todos,
        url: req.originalUrl,
        filtering: filtering
      })
    })
})
And now we’ve got the GIF from up top! 👏
Ok so what? Why go through the trouble of writing things this way? So we can compare approaches. This is our baseline. This is a simple app, written as simply as you possibly can. There’s no real dependencies (a couple express middlewares, but that’s just the ecosystem). There’s no build tooling. No frontend libraries / frameworks. Just a server that sends mostly HTML plus a little JavaScript and CSS.
But we pay a price for that simplicity. Most notably, we round-trip to the server a lot – actually, for every user interaction. And that’s costly. Avoiding that is like, what, 90% of why frontend libraries exist at all? I don’t know, it’s hard to quantify a percentage per se, but undoubtedly it’s why we started moving more and more functionality off our servers and directly onto peoples’ browsers.
Now, hold on to this version of our app, we’re gonna come back to it. But first let’s move it back into 2019. And what better way to do that than rewriting what we just wrote to run on the client?
React Version
I’ll probably skip over quite a bit. This isn’t a React tutorial at all. That first section was a little tutorial-y, but since we so rarely write apps that way anymore, I wanted to draw special attention to that setup. Here I just want to look at some of the complexity we add as we move logic to the frontend.
No More HTML
We don’t write that anymore. Here’s what our server will render instead:
<!-- app/views/index.ejs -->

<!DOCTYPE html>
<html lang="en">
  <head>
    <link rel="stylesheet" media="all" href="<%= manifest['application.css'] %>">
    <script type="text/javascript" src="<%= manifest['todos.js'] %>" defer></script>
    <!-- 👆 don't worry about this manifest bit, it's our css file and our react stuffs -->
  </head>
  <body>
    <div id="root"></div>
  </body>
</html>
And here’s the JavaScript we’ll use to fill that #root element client-side:
// app/assets/javascript/todos/index.js

import React from 'react';
import ReactDOM from 'react-dom';
import { BrowserRouter as Router } from "react-router-dom";

import App from './App';

document.addEventListener('DOMContentLoaded', () => {
  ReactDOM.render(
    <Router>
      <App />
    </Router>,
    document.getElementById('root')
  )
})
Cool. I guess servers were bad at generating and sending actually useful HTML? Out of the gate, we’ve now taken on the burden of determining what to do while the user waits for our JavaScript resources to load, and how to stop services that crawl the web (like Google’s indexers) perceiving our web page as empty. Yes, there’s ways to fix both of these, and it’s not even necessary to for every app, but it’s still on us to make that decision.
We’ve Now Gotta Sync Todos
The source of truth for our users’ todos is undoubtedly our database. If it’s not in there, it doesn’t exist. Back when we were just letting the server render templated HTML, we could just read from the database directly before we processed the template. Once we move rendering to the client, we don’t really control the timing in the same way anymore, and we now have to juggle two data stores: what exists in the database and what our client-side app knows about.
So what’s that mean for our React app? Well first, we have to determine how we load todos initially. And second, how we handle updating todos. This brings a myriad of things we now have to decide and be responsible for (read write code to handle) like: What do we render while todos are loading? How do we load our initial list of todos? When a user updates a todo, how do we render that – for a moment our local copy of todos is more up to date than our databases? We’ve gotta send those updates to the server, but that’s an async process – should we render the most up-to-date data we have, and reconcile any differences after attempting to update on the server?
For this app, we’ll try and keep things simple:
- We’ll fetch todos from the server as soon as our app renders. While it’s loading we’ll just treat it the same as there being no todos.
- Whenever we perform an update, we’ll send that request to the server, and on a successful response from the server, we’ll refetch all the todos.
So let’s change our GET / to support that:
// app/controllers/index.js

router.get('/', function(req, res) {
  if (req.accepts('json') && !req.accepts('text/html')) {
    var query = { where: { sessionUserId: req.session.userId } }
    var filtering = !(req.query.completed === null || req.query.completed === undefined)

    if (filtering) {
      query.where.completed = req.query.completed === "true"
    }

    models.Todo.
      findAll(query).
      then(function(todos) {
        res.header('Content-Type', 'application/json');
        res.send({ todos: todos });
      })
  }
  else {
    res.render('index')
  }
})
So if we hit / with a GET request looking for HTML (as determined by an ACCEPT header), we’ll send back that HTML with just the div#root, otherwise if we hit that same endpoint looking for JSON, we’ll send our todos as JSON.
That’s not simpler…and the Reacts:
// app/assets/javascript/todos/App.js

const App = ({ location: { search } }) => {
  const [cacheKey, setCacheKey] = useState(uuid())
  const refresh = () => { setCacheKey(uuid()) }
  const [todos, setTodos] = useState([])

  useEffect(() => {
    const path = search.includes("completed") ?
      `/?completed=${search.includes("completed=true")}`:
      '/'

    get(path).
      then((res) => { if (res.ok) { return res.json() } }).
      then((json) => { setTodos(json.todos) })
  }, [search, cacheKey])

  return (
    <>
      <section id="todoapp">
        <header id="header">
          <h1>todos</h1>
          <NewTodo refresh={refresh} />
        </header>

        <section id="main">
          <Todos todos={todos} refresh={refresh} />
        </section>

        <Footer search={search} todos={todos} refresh={refresh} />
      </section>

      <footer id="info">
        <p>Double-click to edit a todo</p>
        <p>Created by Gray Kemmey</p>
        <p>Part of <a href="http://todomvc.com">TodoMVC</a></p>
      </footer>
    </>
  )
}
We have an effect that’s responsible for loading todos whenever we render and either our query filter (search) has changed or our cacheKey. cacheKey is an otherwise unused piece of state that we track as a way to give our child components a way to trigger a re-render, and subsequently a re-fetching of todos. That’s what refresh does. It’s a function we can pass to children that when called will call setCacheKey with a new UUID. Oh and we gotta pass that refresh function around to everyone 🙄
Inside our effect, we have a get function which is a light wrapper around fetch. Because communicating with the server no longer comes for free like it does with <forms> – we’re responsible for that for. every. user. interaction.
And that’s the React version of simple.
Rendering Todos
Let’s look a little closer at our Todos and Todo components.
Our Todos component takes all our todos, renders the form for marking all our todos complete, and iterates over each one rendering an individual Todo component:
const Todos = ({ todos, refresh }) => {
  // ...redacted update_many function...

  return (
    <>
      {/* ...redacted toggle input... */}

      <ul id="todos">
        { todos.map((t) => ( <Todo key={t.id} refresh={refresh} {...t} /> )) }
      </ul>
    </>
  )
}
Not too horrid. Actually, a lot like what we had to do in our template before. Just without HTML, and with this other maybe-right-if-we-kept-our-two-client-and-server-versions-in-sync collection of todos… 😬
And for the Todo component, let’s take it in pieces. First the setup:
const Todo = ({ id, title, completed, refresh }) => {
  const [editing, setEditing] = useState(false)
  const [newTitle, setNewTitle] = useState(title)

  const updateTodo = (todo) => {
    return patch(`/${id}`, { todo: todo }).then((res) => { if (res.ok) { refresh() } })
  }

  const destroyTodo = () => {
    destroy(`/${id}`).then((res) => { if (res.ok) { refresh() }})
  }

  return // ...skipped for now...
}
Each Todo tracks two items of state 1) whether it’s being edited and 2) what the new title is. I hate the newTitle bit. Again, we gotta take over something the browser used to do for us – managing the value currently in an input. This pattern is just something we have to do in React. And it’s definitely not simpler than what we had before. In fact, React is patently bad at handling forms.
But in fairness, juggling our “currently being edited” state got better. Let’s add the JSX:
<li className={(editing && "editing") || (completed && "completed") || ""}
    onDoubleClick={() => { setEditing(true) }}>
  <div className="view">
    <input type="checkbox"
           className="toggle"
           value="1"
           checked={completed}
           onChange={(e) => { updateTodo({ completed: e.target.checked ? "1" : "0" }) }} />

    <label>{title}</label>
    <button className="destroy" onClick={destroyTodo} />
  </div>

  <input type="text"
         id="todo_title"
         className="edit"
         autoComplete="off"
         value={newTitle}
         onChange={(e) => { setNewTitle(e.target.value) }}
         onKeyDown={(e) => {
           if (e.keyCode === 27) {
             setNewTitle(title)
             setEditing(false)
           }
         }}
         onBlur={() => {
           if (editing && title !== newTitle) {
             updateTodo({ title: newTitle }).then(() => { setEditing(false) })
           }
         }}
         ref={(input) => { input && input.focus()}} />
</li>
Ok, there is admittedly an elegance to className={editing && "editing"} and onDoubleClick={() => { setEditing(true) }} 😍 Same for our destroy button – onClick={destroyTodo} – that’s way better than rendering a form, with a hidden _method=delete input, and with a submit button. But it should be. That’s the whole value prop (heh, another bad joke 😬) of React!
You know what didn’t get better? That title input. An onChange handler to update our state with the value of the input? That’s gross. And we need a state-plus-update-handler solution like that for every. single. input. any of our forms collect.
Also, look at that onBlur. We’re now responsible for syncing state after we get a response from our server. Before, we could submit the form and forget, so to speak. The server was gonna tell us where to go next. Now, we’re responsible for making sure the view resets post-update, both by calling refresh() to reset our parent’s state and by calling setEditing(false) to reset our own. I don’t love that.
Routing
Or really, more components and more state, it’s just stored in the address bar now. Again, I’m largely gonna skip over this, but I just wanna call out this is yet another thing the browser used to handle for us. We’re now responsible for keeping the address bar in sync with the state of our app. How? Well first we give that state to our App with the <Route> component. And then we use these special Link components here to tell the address bar and our app “Hey, update as if someone had followed this link”.
Build Tooling
I don’t want to beat on a long since dead horse, but Jesus, why is this so difficult? I could have used create-react-app, but it runs its own Express server, so then I’m stuck telling it to proxy requests back to the one we just built and running yarn start twice. That’s fucking gross.
Here’s what I did instead. I think it’s cool. I might be the only one.
Anyway, enough on that.
So is all that React stuff better than what we had before? Well, it’s definitely not simpler. But it does prevent us from having to do full round-trips to the server, and that will always be quicker. But it’s not the only way to accomplish such a thing…
Turbolinks
Full fucking circle baby! ⚫ So what is Turbolinks? It’s a frontend library that makes navigating our web application faster – specifically that 2008 version we wrote above – with minimal changes to that server-rendered-HTML style. If our old skool version is a barebones approach built on the native constructs given to us by HTML, HTTP, and the browser, and if our React version largely does away with those patterns to build atop more custom client-side constructs – Turbolinks sits somewhere in the middle.
If we just include it in our head and start it, Turbolinks will turn all of our link following into remote requests for the new HTML at that location, swap the <body> with the new result, and merge new <script> tags into the <head> – all without reloading the page. If all we wanted to do was submit GET requests for HTML pages, Turbolinks would turn our application into single page app for just a single line of client-side code, and without adjusting our server at all.
That’s amazing! 😲 But…it’s not all our app needs to do – there’s two things Turbolinks can’t do for us without us getting involved:
- It can’t update the address bar if following a link redirects. The remote request will silently follow the redirects, so you’ll get the right HTML back, but the address bar will be out of date.
- It can’t submit forms remotely for us. Unless we arrest some control of that process, native form submission will still take full round-trips to the server.
To fix #1, Turbolinks gives us a Turbolinks-Location header that we can set in the final response of our redirected request. To get a solution that works through any number of redirects, we’ll have to store where we’re redirecting to in the session, and in the route that handles that redirected request, we’ll look for that value in the session, and if it exists write the header.
Here’s what that might look like for our Express app (remember we already pulled in some session middleware above for the userId):
// app/controllers/index.js

router.get('/a_pointless_route_that_merely_redirects_home', function(req, res) {
  if (req.get("Turbolinks-Referrer")) { // was this request from turbolinks?
    req.session.turbolinksLocation = "/"
  }

  res.redirect("/")
})

router.get('/', function(req, res) {
  // render our normal html template
})
In a route that redirects, we look for the Turbolinks-Referrer header because if that’s set, we know Turbolinks hit this endpoint, and if we find it, we go store where we’re redirecting to in the session.
Then we add some custom middleware to our app that for every request, we’ll go ahead check if that session value is set, and if it is, we’ll write out the appropriate header:
// app.js

app.use(function (req, res, next) {
  if (req.session.turbolinksLocation) {
    res.header("Turbolinks-Location", req.session.turbolinksLocation)
    delete req.session.turbolinksLocation
  }

  next()
})
Ok, that solves #1.
For #2, we need to make some changes on the frontend and the backend. On the server, if we get a form submitted remotely we need to respond with a JavaScript payload that calls Turbolinks.visit with the location we’d like to redirect to. And client-side, we need to 1) submit the form remotely, and 2) evaluate that returned JavaScript fragment.
Let’s look at the client-side code first:
// app/assets/javascripts/sprinkles/todos.js

on(document, "submit", "form[data-remote~=true]", function(event) {
  event.preventDefault();
  const { target } = event;

  fetch(target.action, { method: (target.method || "GET").toUpperCase(),
                         credentials: "include",
                         headers: { "Content-Type": "application/x-www-form-urlencoded",
                                    "Accept": "text/javascript",
                                    "X-Requested-With": "XMLHttpRequest" },
                         body: new URLSearchParams(new FormData(target)) }).
    then((res) => {
      if (res.ok) {
        return res.text()
      }

      throw res
    }).
    then((javascript) => {
      script = document.createElement('script')
      script.text = javascript
      document.head.appendChild(script).parentNode.removeChild(script)
    })
})
We can use this handler to submit any <form> tag that’s decorated with data-remote="true". Essentially, it submits the form as the browser would have itself, just with fetch. Then, when it gets a response back – and remember that response should be a small snippet of JavaScript – it adds a <script> tag to the <head> to force the browser to evaluate that response.
Honestly, I wouldn’t even do this yourself. Check out the rails-ujs library. It’s from Rails, but isn’t actually tied to it. It gives you the data-remote stuff, plus more.
Ok, and server side:
// app/controllers/index.js

router.post('/', function(req, res) {
  models.Todo.
    create({ title: req.body.todo.title, sessionUserId: req.session.userId }).
    then(function() {
      if (req.xhr && req.method !== "GET") {
        res.header('Content-Type', 'text/javascript');

        res.send([
          'Turbolinks.clearCache();',
          'Turbolinks.visit("/", { action: "replace" });'
        ].join("\n"));
      }
      else {
        res.redirect('/');
      }
    })
})
And that solves #2. Now our <form> can be submitted remotely, and when it is, we’ll respond with two lines of JavaScript that tells Turbolinks what to do.
So, yes, this would be fucking gross to have to write every time. But both paths through that if / else do the same thing – they redirect. It’s just that if we know it was a remote submission / Turbolinks setup that brought us here, we need to “redirect” a little differently.
So what if instead of writing all that every time, we made res.redirect just do the if check for us? We can of course do that, and that’s exactly what turbolinks-express does for us. It also does the Turbolinks-Location storing and setting for us, too. So if you add the middleware from turbolinks-express to your app, then you don’t actually have to write anything to support Turbolinks server-side. Just use res.redirect like you always have! 🎉
So is all that Turbolinks stuff better than our 2008 version? Well, it’s also definitely not simpler. But it does avoid round-trips to the server, so it’s faster. Nearly always, speed and complexity will oppose one another. But here, we’ve harnessed nearly all the performance benefit of being a single page app for the price of submitting forms remotely, and about ~60 lines of server-side code to monkeypatch Express’s res.redirect function 🐵
Perhaps more importantly than the amount of code it took, is how neatly this fits into our paradigm of writing web apps from 2008. It’s nearly seamless! And for that, we’ve eliminated a large swath of problems we would have to take on using React. There’s no exchanging data. No syncing two versions of truth. No asynchronous SPA framework to deal with. No countless other React-related problems and complexities we take on once we commit to that ecosystem.
Also, the way Turbolinks replaces our whole <body> allows us to just focus on our initial rendering. Right, it’s still just the index.ejs file. We never have to worry about updating individual sections, which we saw a little bit of when we had to undo the state of our todo that was toggled for editing. We just always throw away what we have and re-render everything – the whole index.ejs file.
Are there downsides to Turbolinks? Certainly. We do have to be a little more structured when we write frontend JavaScript that transforms our HTML. And replacing the entire <body> won’t always be the most performant way to have done something. There will be times React would be faster. But that’s fair. Like we said before, simplicity almost always comes at the cost of some speed.
At the end of the day, Turbolinks is a great way to get (most of) the performance from a single page app with (most of) the simplicity of a server-rendered one 🌆
Conclusion
As the industry progresses, I think there’s a tendency to throw the baby out with the bathwater as we learn to build things in new ways. React (and other SPA frameworks) are the current embodiment of that tendency. Definitely there are times where React adds value, is even necessary, but not for most apps. Most of the time, it’s not worth the complexity it adds. Which begs the question, why is it so ubiquitous?
It’s hard to say for sure. But I think part of it is once we learn a tool or a way of building things, it’s natural to use that thing for every thing. Also, I think the industry is dominated by people without a lot of historical context. I work with a fair amount of developers who don’t know what building websites was like in 2008 – some who weren’t building websites pre-React – and that makes it hard to compare approaches. And I doubt that’s a unique story.
Hopefully, this post can provide some of that context and some of those comparisons. Thus far, it feels like Turbolinks has largely been isolated to the Rails community, probably because the Rails framework ships with phenomenal tooling around Turbolinks. But it doesn’t have to stay that way. Hopefully, using Express for these examples can help pull back the curtain on the magics 🔮, and show what’s necessary to give Turbolinks a try in whatever your stack of choice.
Codes
It’s hard to include everything so if you wanna look closer, it’s all in this repo on different branches: